One of the most important tools in my shop is in this photo - give up? It's the WATER! Yes, water. When working with a flame you will get burned. It's not a matter of "if", but rather "when"...
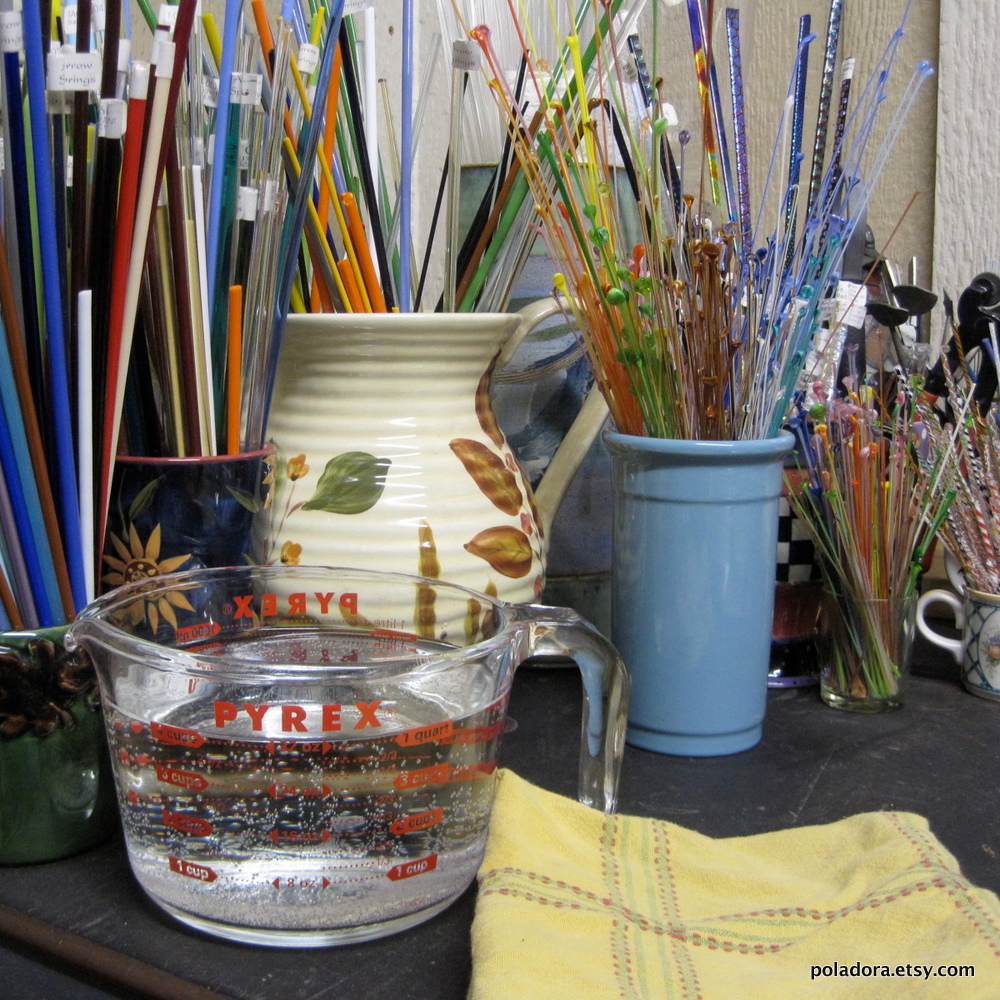
The water that I bring out fresh each time I go to work on my torch, is kept close at hand (hand being the key word here). The first place you want to stick your hand if you happen to burn yourself, is right into that water - and keep it there while the cool water draws out the heat of the burn. If you happen to drop a marble in your lap (done that), and your clothes burn, you can simply grab around the outside of the burnt hole and dunk it in the water.
The water serves other purposes as well. When working with tools such as pliers, tweezers, mashers, etc., you can dip the end of the tool in the water to cool it off so that it does not get so hot that the glass piece or the glass itself doesn't begin to stick to it. Even if it does, a quick dunk in the cool water and a bump on the bottom will release the glass that was stuck to the tool.
Another good use of the cool water is when you are making marbles and using steel punties (handles, instead of the "mandrels" used to make beads that need a hole in them). As soon as you remove one punty to switch to another to work on the opposite side of the marble, the hot punty goes right into the water. This way, you don't need to worry about placing it on some surface nearby that may burn - and the punty is now ready to be used again for the reverse side during your work if needed.
The towel you see next to the water is soaked with either water or window cleaner so that I can wipe off any new glass rod that I am about to heat up in the flame. While most dust and debris tends to simply burn off of the glass as you heat it, I prefer not dealing with that process - especially when working with clear, which has its own set of problems in terms of keeping it clear throughout the process for a sparkling clear end product.
Sunday, November 14, 2010
Saturday, November 13, 2010
Attracked to the Flame...
...does that make me a bug? No wait - I already asked that question. I should keep quiet before someone actually answers it!
I thought some of you may find it interesting to get a little peek into Poladora's Lampwork Shop. There's so much to show and tell that I'm going to make it a multi-part series. ("Oh No - she's going to do the same thing she did to us with 'Verna'!!") Don't worry - Verna is alive and well sitting on my dining room table (no place in my home is safe from my projects). Oh, wait, my lampwork shop is in an outside garage/shop that I share a corner of with my hubby. There are NO torches, kilns, or Oxygen or LP fuel tanks in the house - thought I'd better clarify that.
Above, you can see my torch, my desk, and a few supplies and tools. You can also see my prescription safety glasses for lampwork. These enable me to look at my work in the flame. Without them, I could do serious damage to my eyes and, I would not be able to see my work when it is in the flame. Mine have a magnification because I'm old...
This is a picture of my kiln. It can open from the top or from the front - see the little trap door? I open the front door to place newly made beads and marbles into the kiln for annealing without opening the top and releasing all of the heat in a whoosh.
As you can see, the top also makes a nifty little "warming pad" to warm glass prior to using it in the flame (so that it doesn't explode!) This will be a discussion for another day - along with other useful safety tips...
Oh - the warm top of the kiln also makes an excellent spot for your cup of tea!
Wednesday, November 10, 2010
Can You Describe this Face?...
...I can! It's one of my grandson's expressions and difficult to describe other than WOW! BTW, he's really a very good looking boy.
Yes, we continue to be a parent's worst nightmare...in this case, a Grandpa who makes go-carts for the grandkids. Notice, No seat belts, NO helmets, NO pads... somehow, they both survived the ride around our HUGE circle driveway on the flat.
Ready...


Gee, who do you think is holding on tighter - Grandpa or our grandson?... and is that our grandson's little foot pressing on Grandpa's foot even harder than Grandpa wants to go? Naw! (See, I told you they were both very good looking!)
Yes, we continue to be a parent's worst nightmare...in this case, a Grandpa who makes go-carts for the grandkids. Notice, No seat belts, NO helmets, NO pads... somehow, they both survived the ride around our HUGE circle driveway on the flat.
Ready...
Set...
(I guess Grandpa didn't want his picture taken. BTW, he's quite handsome too.)
GO!...
Gee, who do you think is holding on tighter - Grandpa or our grandson?... and is that our grandson's little foot pressing on Grandpa's foot even harder than Grandpa wants to go? Naw! (See, I told you they were both very good looking!)
Saturday, November 6, 2010
The Search for "Verna"...
Here are just some of the pieces of fabric and batting needed to complete this Verna Totse project for my boutique Poladora...
Not included are interfacing, elastic, and elastic fabric covering, which have not been cut yet, thread choice (which I hate since it means I have to wind a bobbin - why is winding bobbins such a dreaded task when it is actually such an easy one?!?), and choice of button. (I always choose the button last because I want something that goes with the overall personality of the Totse and that's hard to do until it's partially finished.)
Thursday, November 4, 2010
Golden Harvest Under Construction...
I spent all day sewing all of the different squares and pieces together to create this finished top (by "finished", I mean it's all sewn together now, whereas in the previous post they were just pieces sitting separately on my design board so I could decide where I wanted each piece to be).
Then, I pinned my mini Pizzazz top to a piece of Warm and Natural all cotton quilt batting (so the fabric would stay smooth while I stitched it to the batting), and then machine stitched all around the piece with a ziz-zag stitch (very tiny), to prevent fraying of the material top while I progressed with my process. I also ran a bead of Fray Check along the zig-zag to further secure the fabric from fraying.

I like to leave a little bit of batting all around the edge for my next step. I will trim it later.
Next step - on to the hand-embroidery of focal features within the focal fabric, using a special gold metallic embroidery thread (Madeira), to match the gold outlining of the print. I'll also do some gold beading in specific areas of the overall piece to make my "Golden Harvest" mini Pizzazz quilt more interesting and unique.

The hand-embroidery and beading will take the longest time in the process - so stay tuned!
Then, I pinned my mini Pizzazz top to a piece of Warm and Natural all cotton quilt batting (so the fabric would stay smooth while I stitched it to the batting), and then machine stitched all around the piece with a ziz-zag stitch (very tiny), to prevent fraying of the material top while I progressed with my process. I also ran a bead of Fray Check along the zig-zag to further secure the fabric from fraying.
I like to leave a little bit of batting all around the edge for my next step. I will trim it later.
Next step - on to the hand-embroidery of focal features within the focal fabric, using a special gold metallic embroidery thread (Madeira), to match the gold outlining of the print. I'll also do some gold beading in specific areas of the overall piece to make my "Golden Harvest" mini Pizzazz quilt more interesting and unique.
The hand-embroidery and beading will take the longest time in the process - so stay tuned!
Golden Harvest...
I can't guarantee that this mini pizzazz will turn out the way you see it here - because you just never know with me since I'm never satisfied! (I'm a first born perfectionist - it' a sickness...) But I thought you'd like to see part of the process in any event.
Isn't this a gorgeous fabric? It's soooo Fall - sooo harvest - soooo elegant...stop me please!
Sunday, October 31, 2010
Not Your Average Egg...
Well, are you hungary yet? If not, you've either just eaten a big meal, or I take bad pictures...or both.
Our daughter Jen, her husband and our b-e-a-u-t-i-f-u-l granddaughter were here this weekend and I made them egg casserole for breakfast. (My husband actually does all of the cooking in our house - I only cook to impress company.)
Jen asked for the recipe and I thought "Great! This is a great way to further procrastinate on my 'Verna' progression! (As in not progressing.) Instead of giving it to her - I'll just blog it!" So, here ya go...
Ingredients:
6 slices of bread (cubed) - I like to use potato bread
6 large brown eggs - OK, OK, white is fine too
2 cups of 2% milk
1/2 cup aerosol whipped cream - I prefer extra creamy (exact measurement not critical)
1 lb tube of Bob Evans original sausage - I know, I know, the arteries...
1 cup shredded cheddar cheese
1/2 cup dry chopped onion - in the spice section at your grocery store
1 small red bell pepper (cut into tiny squares) - don't want to freak out the kids...
1/2 tsp vanilla - yes, really
buttered sheet cake baking pan or smaller - not too big or it will come out too flat
Note: This is a recipe you prepare the night before, and then bake the following morning for breakfast or brunch.
Precook the sausage into crumbles the size of small marbles - remove the sausage from the pan and set aside. Keep the pan with its drippings in it and add the red bell pepper (already cut up).
On low heat, spread out the pepper to evenly cook. Add 1/4 tsp of sugar to the top of the peppers. This will sweeten the peppers. (Peppers have a tendancy to "overwhelm" a recipe once in it - this reduces that effect and adds just the right flavor.)
While your peppers are cooking on low, blend your eggs, milk, shredded cheddar, chopped onion, and vanilla. (Time to turn over the peppers to cook on the other side.)
Add the bread cubes and make sure it's mixed evenly. Add your sausage (separately), and reblend evenly.
Cover with plastic wrap and keep in the frig overnight. This is very important. It allows these different flavors to merge in a way that they can't do if stuck right into the oven.
The next morning, preheat your oven to 300 degrees F. Go fix your cup of coffee and if you need them, put your glasses on!...
Place baking pan in oven at 300 degrees and set the timer for 30 minutes. At the end of 30 minutes, pick up the pan with two hands (using pot holders please), and see if the mixture moves easily back and forth in the pan with a slow rocking motion. If it does, it's not done. Check every 5 minutes thereafter until the center solidifies - don't let it get too brown on the top. (It may be a little loose in the very center when done but will harden up once it sits out for 5-10 minutes.) Don't forget there is melted cheese in there - it may not mean the eggs are not done.
Once it sits out of the oven for 5 to 10 minutes, it is ready to cut into squares for serving. Depending on the size of square cut, use a spatula or broad fork to remove each piece. These squares reheat in the microwave beautifully the following day - or freeze leftover squares in individual ziplocks for another day.
Bon Appetite! (Did I spell that right?!)
Subscribe to:
Posts (Atom)