Thursday, December 23, 2010

Winter Wonderland...


I woke up this morning with a splitting headache - not to mention that I didn't even fall asleep until 6:00 AM! Then, I looked out the window and much to my pleasure and surprise was a winter wonderland! Suddenly, I felt much better. In fact, I thought it was so pretty that I put my boots on and ran out and took these pictures - yes, in my bathrobe! I must have been quite a sight! But, that's the benefit of living out in the country - no neighbors!

It's amazing what you'll do for a picture...

Thursday, December 16, 2010

Getting Ready for Christmas...

...sometimes a joy - sometimes a burden. I guess that's up to us to decide individually. It probably boils down to whatever you make it, like everything else.

We'll be hosting Christmas again this year up north with all of the kids and grandkids that can make it and I always really look forward to that. I worry too much about having everything fair and perfect I know, but I realize that the most important thing for me is actually having my family around me. It's not always possible to have them all be there at the same time (our family is pretty big), but to me, that would be the perfect Christmas.

I'll start making cookies soon - so not much time these days for the Boutique. I've finished placing the Christmas items in the shop that will be there. All items moving forward will be from other than holiday projects... Gee, do you think I'll ever get to that "Verna" project again? LOL - I've managed to turn that project into a giant mental block! But wait and see, it will probably turn out beautiful when it's finally finished, and then I'll wonder why I waited so long to finish it! Probably.

Wednesday, December 15, 2010

A Worthy Cause...

...No, I am not talking about finishing the Christmas Nine-Patch Pizzazz quilt I blogged about last time. Although I would have liked to finish it in time for Christmas selling, it's not to be...sigh. Perhaps next year.

In the meantime, I thought I'd show you what I am working on - to meet a deadline.

These are parts of some scarves that I've pledged to make for the Special Olympics - Wisconsin. These are their colors and instructions are given on what yarn, what colors, and a deadline for creating these scarves, which will be worn by both the participants and coaches, etc. It's an event of "unity" to be wearing the scarves during the Special Olympics activities. The deadline for shipping the finished scarves you've pledged is January 14th. They may be crocheted or knitted and may include specific phrases.

If you have any interest in this project, you may visit the Project Guidelines page (for Wisconsin), at www.shopredheart.com/default.aspx?PageID=424&ProjectID=3+ (You can probably navigate out of there to your particular state for colors, etc.)

Wednesday, December 8, 2010

A Sneak Peek...

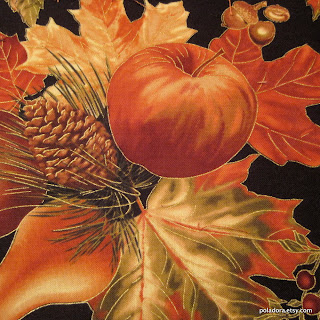
...at a holiday fabric family that I am currently working on for a project for Christmas. Yes, I know, I'm pushing the envelope on this one! But then, when don't I?

The first photo reveals one of the 9-patch squares that I will be using as "dancing" blocks in my Pizzazz style quilt, which are meant to get your eye to "travel" through the piece like a painting on a canvas.

Ah yes...the second photo reveals a little three-dimensional "pucker" project I've decided to include in this quilt. Won't that be fun?

The third photo shows the red I will be using to create a border around the piece when finished.


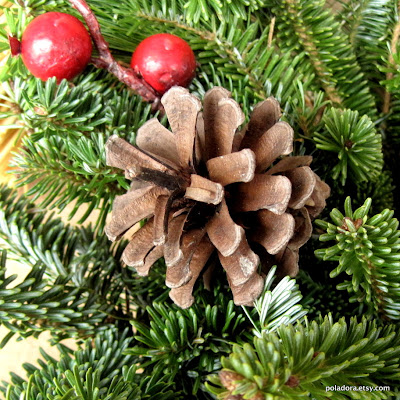
A little more detail in the last photo reveals the type of greenery - lots of long pine needles - that will be scattered throughout this Christmas piece.


Wednesday, December 1, 2010

The Joys of Owning a Doxie...

...it's called "Doxie Moxy"! And, anyone who owns a Duchshund knows exactly what I'm talking about!

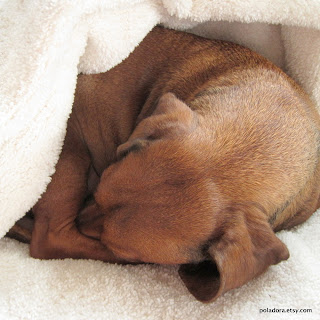
In this first photo, "Daddy" has created a "cave" on the couch next to him for Teddy to sleep in while Daddy watches TV. Well, that also happens to be my spot!

Not lifting his head when I come into the room - he is pretending to be asleep so "Mommy" doesn't make him move! But wait!...the second photo reveals that he is indeed awake and trying not to be noticed! (When have you heard of a Doxie not lifting his head or greeting you when he hears you come into the room??)


Uh-Huh...I can play this game...so I grabbed my camera to catch this little actor and he still did not lift his head! (He also does not want to go outside to piddle - it is snowing after all!)


Putting the camera right in his face - and he still does not lift his head - his eyes are open but he still won't look me in the eye! Now how "Doxie" is this?!

(I'm laughing.)

Monday, November 29, 2010

Attracked to the Flame - Part VI

I just finished taking some finished (annealed), beads off of their mandrels, and thought you'd like to take a peek...

The ones with "fish eyes" and black bumps are a continuing series I'm making for a jewelry project for my boutique Poladora. The other beads are my attempt at some "Christmas" beads.

I wanted to make some wine stoppers for Christmas...I guess I'd better get going - huh?

Wednesday, November 24, 2010

Golden Harvest is finally finished!

Golden Harvest is now offered in my Internet boutique Poladora!

Since the last update below, I have quilted the front to a backing of coordinating fabric - a beautiful and elegant leaf patterned fabric in the same color way as the top, with golden outlines of some of the leaves. This fabric made up some of the pieces in the top as well.

The bias binding is made from another coordinating fabric that I also used on the top, with swirls and golden dots.

To see close ups of the detail of the embroidery and beading, click on Poladora and take a peek!

Tuesday, November 23, 2010

Attracked to the Flame - Part V

Here you can see my kiln with its front door open. Inside is a collection of waste glass (bad work or trouble with annealing), that I'm reheating so I can remake it into something else. (In order to do that, I have to make sure that all of the release agent is removed from the inside of the bead.)

The little "tray" is enamel-coated steel and is filled with popcorn salt. This is a great way to place your marbles in the kiln for annealing and not have them either roll around - or worse - roll right back out of the kiln and into your lap! The popcorn salt is fine enough that if you place the marble into the tray at the right moment of hardening, it will not make any marks on the marble's surface.

If I am not making marbles, I remove the tray and lay my mandrels with finished beads on them right on the floor of the kiln, which is coated with a thin layer of popcorn salt in the back. (The inside of the kiln is short enough that the mandrel can still stick out a bit at the end.) The "trap door" of the opening, with its soft insulation layer, wraps itself around any mandrels that may be sticking out of the kiln to seal in the heat.

Different glasses need different temperatures for annealing. I am usually working at an annealing temperature of between 950 and 1000 degrees F.

Monday, November 22, 2010

Attracked to the Flame - Part IV

In this picture, you can see some of my mandrels laying on my work surface. (My work surface is metal in case some hot glass spits off of a rod I'm trying to heat, or if the glass gets so hot that it literally drips off of the rod and onto the surface of my desk.)

The mandrels are the metal rods and are made out of stainless steel so they don't rust. They look lighter in color at the tip because I have just finished running each of them over my hubby's belt sander to get a nice roughed-up surface for the release agent to adhere to. The release agent is something you stick the rods into and allow to dry before using the mandrel to make a bead. This allows you to remove the bead from the mandrel after it has been annealed in the oven and cooled down. If you did not use release agent, the melted glass would stick right to the rod permanently. You can get release agent in dark gray or light blue. I prefer the light blue since you can never remove 100% of the release agent from the hole in the bead, and anything left over, if light blue, has a cleaner look than the dark gray, which tends to look dirty. If I have a really clear bead, I like to do the extra work to get all of the release agent out, which takes a lot of sanding with tools with diamond bits on them, and then finish the piece by coating the inside of the hole with a clear laquer.

Thursday, November 18, 2010

Golden Harvest Progress...

I have finished the "embellishments" on the top of this mini Pizzazz quilt. I've used shiny metallic thread to outline some of the prominent golden outlined elements, and beaded where I thought it would make the most impact. This is the part of the process that takes the longest amount of time.

This represents the beading I did in the center of the daisy mums. The size of the beads are 11/0 in a matte brown with some speckle.
This photo shows the beading I did to enhance the berries. I used a lighter color in the center and darker cranberry beads around the outer areas to create a three dimensional look. These beads are also 11/0 glass beads in a shiny-clear finish. The center beads are clear on the outside and colored pink on the inside.
This last photo represents some of the gold beading I did to follow the swirling on one of the coordinating fabrics in the piece. These are precision made Aico gold coated glass beads, size 11/0 in hexagon shape and a matte finish.

The next step is to sew the backing fabric to the top and begin "quilting" the two pieces together.

Tuesday, November 16, 2010

Attracked to the Flame - Part III

Speaking of getting burned... This is the kiln. When I bring the temperature up to around 1,000 degrees F. to anneal my glass work, the outside of the kiln gets hot to the touch as well - especially the metal parts! However, these warm surface areas outside of the kiln become a very useful tool. (The white top you see does not get as hot.)

In the first picture, you can see some glass rods and "frit", along with some stringers up on top of the kiln. The reason they are there is to warm them prior to use. If you warm your rods before taking them to the flame for melting, it is less likely that they will crack or break. Broken rods can shoot hot glass across a room and if it lands on something that can be burned, it will leave a permanent scar - not to mention if it hits your face! (Although, typically it will shoot away from you - so be aware of what is lying in front of your working space.)

I use stainless steel items to place my rods in so that they don't roll around while on the the top of the kiln. The tip of the rod that I will be melting in the flame is placed on the kiln, while the other end (handle), is placed off of the kiln as far as possible without it falling off. This keeps the part of the rod you will be holding cool enough to handle without burning yourself when you pick it up. It also keeps the paper tag from burning, which I like to keep so I know what colors I have used up and need to reorder.

Contained in the colorful dishes on the top of the kiln in the second photo are what I call recyclable waste glass - in other words, mistakes! Many beads and marbles do not work out to my high standards of perfection. If that happens, I remelt the glass and use it for something else - usually marbles for my grandsons (I have plenty). It is always good to preheat these larger pieces of glass before trying to reintroduce them to the flame since they can crack, split, explode, break into a million pieces and fall onto your work table below (or your lap!), and the list goes on. So I warm them ahead of time on top, and if I'm going to actually introduce large pieces into the flame, they're actually placed inside of the kiln for a while.

The tiny pieces of glass you see are called "frit". When pulling stringers (a subject for another day), they tend to spit off a tiny tip of the pull spot and leave it on the work space when you pick up the frit for sorting and storage. Depending on what the stringers were made for - some can be striped or swirled, or very colorful - these tiny tips can make for some very interesting color combinations (or "confetti") on top of an already formed bead as a last step. I like to use the inside of marble with a lot of clear in between so they seem to be floating inside.

I guess the bottom line here is to warm your raw materials as much as possible before carefully and slowly introducing them to the flame for melting. Things will go much smoother if you do.

Sunday, November 14, 2010

Attracked to the Flame - Part II

One of the most important tools in my shop is in this photo - give up? It's the WATER! Yes, water. When working with a flame you will get burned. It's not a matter of "if", but rather "when"...

The water that I bring out fresh each time I go to work on my torch, is kept close at hand (hand being the key word here). The first place you want to stick your hand if you happen to burn yourself, is right into that water - and keep it there while the cool water draws out the heat of the burn. If you happen to drop a marble in your lap (done that), and your clothes burn, you can simply grab around the outside of the burnt hole and dunk it in the water.

The water serves other purposes as well. When working with tools such as pliers, tweezers, mashers, etc., you can dip the end of the tool in the water to cool it off so that it does not get so hot that the glass piece or the glass itself doesn't begin to stick to it. Even if it does, a quick dunk in the cool water and a bump on the bottom will release the glass that was stuck to the tool.

Another good use of the cool water is when you are making marbles and using steel punties (handles, instead of the "mandrels" used to make beads that need a hole in them). As soon as you remove one punty to switch to another to work on the opposite side of the marble, the hot punty goes right into the water. This way, you don't need to worry about placing it on some surface nearby that may burn - and the punty is now ready to be used again for the reverse side during your work if needed.

The towel you see next to the water is soaked with either water or window cleaner so that I can wipe off any new glass rod that I am about to heat up in the flame. While most dust and debris tends to simply burn off of the glass as you heat it, I prefer not dealing with that process - especially when working with clear, which has its own set of problems in terms of keeping it clear throughout the process for a sparkling clear end product.

Saturday, November 13, 2010

Attracked to the Flame...

...does that make me a bug? No wait - I already asked that question. I should keep quiet before someone actually answers it!

I thought some of you may find it interesting to get a little peek into Poladora's Lampwork Shop. There's so much to show and tell that I'm going to make it a multi-part series. ("Oh No - she's going to do the same thing she did to us with 'Verna'!!") Don't worry - Verna is alive and well sitting on my dining room table (no place in my home is safe from my projects). Oh, wait, my lampwork shop is in an outside garage/shop that I share a corner of with my hubby. There are NO torches, kilns, or Oxygen or LP fuel tanks in the house - thought I'd better clarify that.

Above, you can see my torch, my desk, and a few supplies and tools. You can also see my prescription safety glasses for lampwork. These enable me to look at my work in the flame. Without them, I could do serious damage to my eyes and, I would not be able to see my work when it is in the flame. Mine have a magnification because I'm old...


This is a picture of my kiln. It can open from the top or from the front - see the little trap door? I open the front door to place newly made beads and marbles into the kiln for annealing without opening the top and releasing all of the heat in a whoosh.

As you can see, the top also makes a nifty little "warming pad" to warm glass prior to using it in the flame (so that it doesn't explode!) This will be a discussion for another day - along with other useful safety tips...

Oh - the warm top of the kiln also makes an excellent spot for your cup of tea!

Wednesday, November 10, 2010

Can You Describe this Face?...

...I can! It's one of my grandson's expressions and difficult to describe other than WOW! BTW, he's really a very good looking boy.

Yes, we continue to be a parent's worst nightmare...in this case, a Grandpa who makes go-carts for the grandkids. Notice, No seat belts, NO helmets, NO pads... somehow, they both survived the ride around our HUGE circle driveway on the flat.

Ready...


Set...                                                
(I guess Grandpa didn't want his picture taken. BTW, he's quite handsome too.)
GO!...


Gee, who do you think is holding on tighter - Grandpa or our grandson?... and is that our grandson's little foot pressing on Grandpa's foot even harder than Grandpa wants to go? Naw! (See, I told you they were both very good looking!)

Saturday, November 6, 2010

The Search for "Verna"...

...has paid off! I found her hiding under one of my other projects! Who knew?

Here are just some of the pieces of fabric and batting needed to complete this Verna Totse project for my boutique Poladora...


Not included are interfacing, elastic, and elastic fabric covering, which have not been cut yet, thread choice (which I hate since it means I have to wind a bobbin - why is winding bobbins such a dreaded task when it is actually such an easy one?!?), and choice of button. (I always choose the button last because I want something that goes with the overall personality of the Totse and that's hard to do until it's partially finished.)

Thursday, November 4, 2010

Golden Harvest Under Construction...

I spent all day sewing all of the different squares and pieces together to create this finished top (by "finished", I mean it's all sewn together now, whereas in the previous post they were just pieces sitting separately on my design board so I could decide where I wanted each piece to be).

Then, I pinned my mini Pizzazz top to a piece of Warm and Natural all cotton quilt batting (so the fabric would stay smooth while I stitched it to the batting), and then machine stitched all around the piece with a ziz-zag stitch (very tiny), to prevent fraying of the material top while I progressed with my process. I also ran a bead of Fray Check along the zig-zag to further secure the fabric from fraying.

I like to leave a little bit of batting all around the edge for my next step. I will trim it later.
Next step - on to the hand-embroidery of focal features within the focal fabric, using a special gold metallic embroidery thread (Madeira), to match the gold outlining of the print. I'll also do some gold beading in specific areas of the overall piece to make my "Golden Harvest" mini Pizzazz quilt more interesting and unique.


The hand-embroidery and beading will take the longest time in the process - so stay tuned!

Golden Harvest...

...will be the name I give this Thanksgiving mini pizzazz decorative quilt when it is finished! All you can see here are just the individual pieces laid out on my board in the pattern that I want to stitch it together in.

I try to look at each pizzazz as a painting and envision a source of light coming in from one corner at the top and washing down the "canvas" to the bottom opposite corner. This gives me an opportunity to "weight" the patches and it makes it easier to decide which patches should go where.

I can't guarantee that this mini pizzazz will turn out the way you see it here - because you just never know with me since I'm never satisfied! (I'm a first born perfectionist - it' a sickness...) But I thought you'd like to see part of the process in any event.

Isn't this a gorgeous fabric? It's soooo Fall - sooo harvest - soooo elegant...stop me please!

Sunday, October 31, 2010

Not Your Average Egg...


Well, are you hungary yet? If not, you've either just eaten a big meal, or I take bad pictures...or both.

Our daughter Jen, her husband and our b-e-a-u-t-i-f-u-l granddaughter were here this weekend and I made them egg casserole for breakfast. (My husband actually does all of the cooking in our house - I only cook to impress company.)

Jen asked for the recipe and I thought "Great! This is a great way to further procrastinate on my 'Verna' progression! (As in not progressing.) Instead of giving it to her - I'll just blog it!" So, here ya go...

Ingredients:
6 slices of bread (cubed) - I like to use potato bread
6 large brown eggs - OK, OK, white is fine too
2 cups of 2% milk
1/2 cup aerosol whipped cream - I prefer extra creamy (exact measurement not critical)
1 lb tube of Bob Evans original sausage - I know, I know, the arteries...
1 cup shredded cheddar cheese
1/2 cup dry chopped onion - in the spice section at your grocery store
1 small red bell pepper (cut into tiny squares) - don't want to freak out the kids...
1/2 tsp vanilla - yes, really
buttered sheet cake baking pan or smaller - not too big or it will come out too flat

Note: This is a recipe you prepare the night before, and then bake the following morning for breakfast or brunch.

Prepare in this order:

Precook the sausage into crumbles the size of small marbles - remove the sausage from the pan and set aside. Keep the pan with its drippings in it and add the red bell pepper (already cut up).

On low heat, spread out the pepper to evenly cook. Add 1/4 tsp of sugar to the top of the peppers. This will sweeten the peppers. (Peppers have a tendancy to "overwhelm" a recipe once in it - this reduces that effect and adds just the right flavor.)

While your peppers are cooking on low, blend your eggs, milk, shredded cheddar, chopped onion, and vanilla. (Time to turn over the peppers to cook on the other side.)

Add the bread cubes and make sure it's mixed evenly. Add your sausage (separately), and reblend evenly.

Pour mixture into the baking pan and even out. Take your now-cooked red pepper squares and evenly dispurse them across the top of the mixture in the pan. Use a butter knife to push each one into the mixture to varying depths. Sprinkle a little shredded cheddar over the top for fun.  

Cover with plastic wrap and keep in the frig overnight. This is very important. It allows these different flavors to merge in a way that they can't do if stuck right into the oven.

The next morning, preheat your oven to 300 degrees F. Go fix your cup of coffee and if you need them, put your glasses on!...

Place baking pan in oven at 300 degrees and set the timer for 30 minutes. At the end of 30 minutes, pick up the pan with two hands (using pot holders please), and see if the mixture moves easily back and forth in the pan with a slow rocking motion. If it does, it's not done. Check every 5 minutes thereafter until the center solidifies - don't let it get too brown on the top. (It may be a little loose in the very center when done but will harden up once it sits out for 5-10 minutes.) Don't forget there is melted cheese in there - it may not mean the eggs are not done.

Once it sits out of the oven for 5 to 10 minutes, it is ready to cut into squares for serving. Depending on the size of square cut, use a spatula or broad fork to remove each piece. These squares reheat in the microwave beautifully the following day - or freeze leftover squares in individual ziplocks for another day.

Bon Appetite! (Did I spell that right?!)

Friday, October 29, 2010

Grandmother Withdrawal...

Getting back to the bi-line of my "Poladora" banner, I'd like to talk about my relationship with my beloved Grandmother and how everything she taught me as a child to pass along to my grandchildren has gone to waste (at least, in my mind).

See this little cutie? I love her to death. But, she's only one of six grandchildren and I don't see her that often because she lives in another state (I hope to change that someday when we move there - soon.) Even the kids close by are not an everyday part of our lives. (I admit that some of that is my fault due to my ruptured disc and my past career choice as a Chairman and CEO - so I'll take my lumps.)

But that's not the point. The point is that I had the most wonderful grandmother (and grandparents on the other side), anyone could ever ask for. More importantly, she/they taught me things that were enduring and could have and should have been passed down to my grandchildren. But, I can't. Not because I don't want to, but because I keep hitting roadblocks that are difficult to accept. Don't get me wrong - I have wonderful adult children and my experiences with this are limited to specific incidences that in some cases, are just a sign of the times.

Things are different now. The days of staying at Grandma's for a couple of weeks in the summer are over. The days of teaching your granddaughters the fine etiquette of linen folding and "company manners" is over. No child I know can ride a bike without a helmet. Hmmm...I lived! They can't ride in your car with you because you don't have the right car seat! (And, moving that car seat from their vehicle to yours is just beyond the pale of possibilities...)

We can't teach our grandchildren things we would like to pass down from our generation or generations before us because - well, you name it - it's too dangerous, it's not politically correct, the parents would rather have that memory for themselves (but they don't seem to ever get to it), we might give them something that's well,  not good for them - like sweets! OMG! Dare I say it? The "S" word?? SUGAR!!! There, I said it. (BTW, Kool-Aid was a fine thing in my day, AND, there was no childhood obesity or diabetic problem like there is today.) Anyone hear of the term "everything in moderation"?

What happened to the days where Grandma and Grandpa could be the bad guys - you know, the ones who get away with sneaking something considered not great for the kid - but an awful lot of fun!? I remember my Grandma letting me stay up later than the other 4 kids in her care for the weekend (I was the oldest by 4 years), watching the late movie - which I probably didn't understand at all (remember "Johnny Belinda"?) - and sharing in Grandma's little before-bed ritual of a cup of instant Sanka and a piece of coffee cake slathered in butter. WOW, was that great! How I slept those nights, I'll never know.

BUT, bedtime included climbing into bed with Grandma at the same time and reading a book before I dozed off. I was only imitating Grandma but don't you get it? That's what it was all about...even if she did give me "Moby Dick" and "The Old Man and the Sea" as reading material as a little girl in grade school... E-Gads. No wonder I fell asleep!

Am I ranting? You bet I am. Read what I wrote about my SISSY Smart Start Tummy Time Play Blanket in my Etsy boutique - "Poladora". I believe every word of it. This generation of children are growing up with weaker immune systems because they live in bubbles and can never take any risks. They're overprotected, overscheduled, overdriven (in cars), oversanitized, and have way too many toys. (Yes, I'm guilty of contributing to this - but I do try to make them things like marbles, zipper pulls, dresses, cuddle blankets, and even doll clothes....)  BUT, most important, they have no down time!

My generation of kids didn't die more! We really lived! We walked to school and back (and froze our little buns off). We stayed overnight at our friends houses almost every weekend (and weren't molested). We went to the park with friends ALONE. We lived, we played, we created our own fun with a rock and a twig. We became creative, we became self-sufficient, we became independent, we moved out of our parents' home at 18, not 30-something. We got married young and had babies before we were 30!

I wanted to be the best Grandmother I could in memory of my beloved Grandmother Paulina, who I loved more than life itself. Just look at my blog, my flkr photostream, and my boutique - almost everything you see came somehow, someway from my relationship with her. Don't rob your children of the opportunity to expand their world and learn all about who their elders and ancestors are. My favorite times were listening to Grandma tell me stories about "the old country". You owe this history it to them in a way only grandparents can tell it.

Some of my children may take this post personally - don't. I love you all and not all of you have done any of the above. God knows that I wasn't the best parent - but I think all of you are great parents in very different ways.

I'm simply sharing my frustration with not being able to fulfill my purpose, as I see it.

Thursday, October 28, 2010

Tippy Hedren, Where Are You?

I woke this morning to the most amazing scene! Outside of my bedroom window, and covering the entire front yard like a carpet, was a flock of migrating black birds. They stretched all the way from the house to the street! And I live on a farm!

I called my hubby to come look and as soon as he walked into the room, they flushed. And what a scene! My whole window became just a wall of black. (My camera is never where I need it!)


They flew up over the house and into the pasture just outside of our back yard. The numbers were so great, I just could not capture it on film - sniff.

Anyway, in my bathrobe and through a double pane window with a storm in the back of the house, these were the only shots I could get.


Geeze - hold still, will you?? This is worse than trying to capture the grandkids!

Tuesday, October 26, 2010

"Hang on to Your Hat!"

I always laugh when I see that on my weather station readout when it's windy...but 60 MPH wind gusts? Oh, come on!

I'm grounded...no torch...no sewing...no watching (satellite) TV - well, unless you're into the pixel look. And sometimes, no Internet! But hey, I think I can just barely squeeze this one in before I'm dead again - just to whine...


BTW, do you think my little "Teddy" will mind if I reproduce him in a bead?
 The End...

Saturday, October 23, 2010

Looking for "Verna"...

...haven't found her yet... but, I did put some things together with those halloween beads I made - oh, and a "Polka Pumpkin" totse!


Look Ma - I can make glass buttons on my torch! (Working with a pair of double mandrels is great new fun - NOT. )
Here's three of the bead pens I put together...

Pumpkins, pine cones, acorns, ghosts, and spiders - oh my!
Would you like a little cheese with that whine? Or is it the other way around? (I prefer to just whine...)

Oh Verna - where art though? I'm sick of pumpkins already - on to snowmen or whatever...


You can see these items and more at my boutique Poladora.